
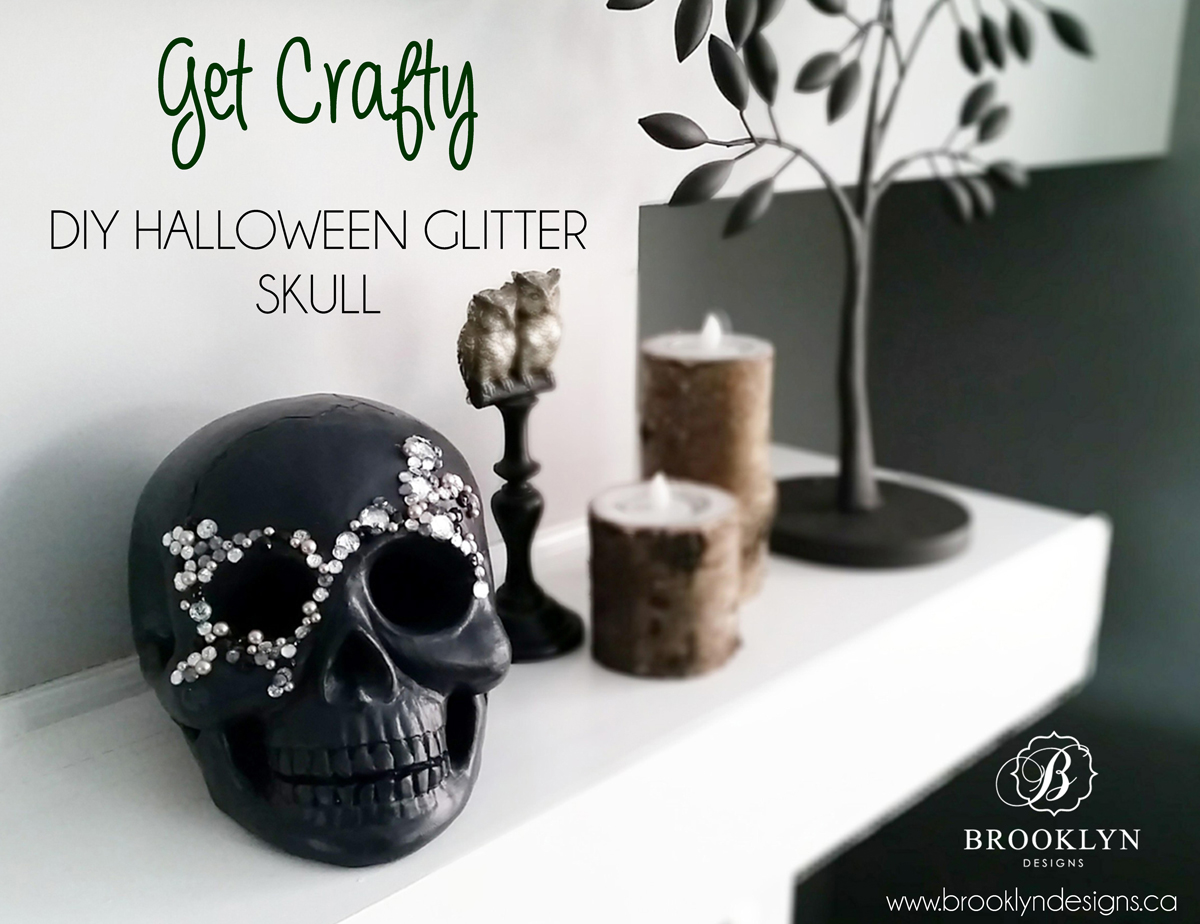
I'm not one to decorate for Halloween, but when Micaela and I were coming up with ideas for our crafting series we had to include this spooky night. What better way than with a chic and sparkly, creepy black skull!
The supplies you'll need for this project are:
- one skull for crafting ( we purchased ours at Michaels)
- one black acrylic paint
- one dark grey acrylic paint
- sponge painting brush
- glitter, crystals, pearls, etc. for decoration
- crafting glue
(try for one that is non-toxic so that the fumes don't both you)

Step 1: Mix the black and dark grey acrylic paints together to create a very dark smoky grey. Paint the entire outside surface and inside surface of the skull, making sure to not leave any of the white showing. Let your skull dry completely before moving onto step 2.

Step 2: Take your glitter, crystals, pearls, etc. and start gluing them onto the surface of your skull. This is when it gets fun!! You can create whatever you like with your skull. You can choose an assortment of colours and textures to add to it. If you like a monocromatic look like I chose, make sure all of your adornments match before you start gluing. You might have to do the gluing in steps to allow for the crystals to properly dry and to create layers as well.

Here are some pics of Micaela's skull and mine as well. This was really fun! I love how Micaela has the gems dripping down it's face and inside the cracks in the skull. This is a great craft project for you to do for yourself (no kids if you don't want to!!) or even with your tweens and teens.

Once you've finished your skull you can place it on your mantel, or favourite reading corner for a spooky, yet chic Halloween treat.

We want to see your finished projects! Tag us on INSTAGRAM with #BrooklynDesigns #bdcrafty and show us your amazing creations!
Want to get even more crafty with us? Check out our Botanical Wall Art project and look for more Get Crafty projects coming up.


.jpg)

.jpg)
.jpg)


No comments:
Post a Comment